An ETH Node in Minutes
With the recent explosion and growth of the crypto ecosystem a new generation of crypto enthusiasts and fans alike have begun to contribute to the Ethereum ecosystem. One of the ways to contribute is to run your own node!
In Ethereum.org's words - "Running your own node enables you to use Ethereum in a truly private, self-sufficient and trustless manner. You don't need to trust the network because you can verify the data yourself with your client."
- Your node verifies all the transactions and blocks against consensus rules by itself. This means you don’t have to rely on any other nodes in the network or fully trust them.
- You won't have to leak your addresses and balances to random nodes. Everything can be checked with your own client.
Today we'll show you how to run your own ETH node, in less than 10 minutes!
Step 1: Setup
We'll be using Zeet to deploy your ETH node – Zeet makes it super easy to run any open source code, without you having to think about all the details that go into running a complex project.
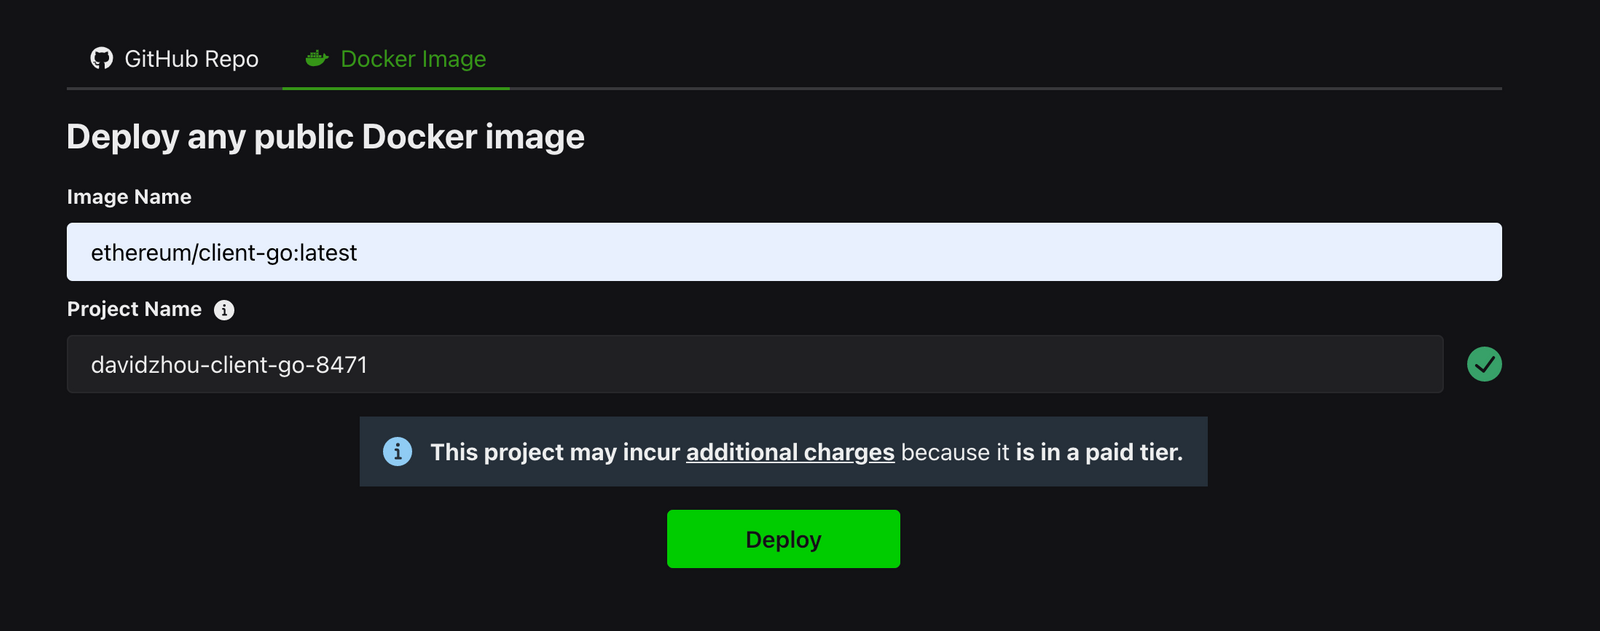
- First navigate to Zeet and click the New Project button in the top right
- Select the Docker option. If this is your first time using Zeet, login with your Github account.
- Select the middle option Side Project when asked what kind of project you're deploying.
If prompted, input your payment details
- In the image name paste ethereum/client-go:stable - this is the official Etherum Docker package to deploy an ETH client node written in Go!

Step 2: Configure
Well done, you are now the proud owner of your very own ETH node 👏
Almost.
Your node is up, but it needs a bit more configuration to be useful. To move forward, you need to answer a question:
How much data do I want to process?
Your ETH node needs to catch up to the full ETH blockchain. There are a few ways of doing this:
- Full sync downloads all blocks of the blockchain and replays all transactions that ever happened. While doing so, it stores the receipts of transactions and continuously updates the state database.
- Fast sync does not replay transactions. It will catch up to the current state of the blockchain, and then operate like a normal node. You can also find additional information here
- Archive mode. This is basically the same as a Full node, but it saves the full history onto the disk, instead of throwing it away after replaying
Note: There are other options you can pass to your container, for a full list see here
Step 2.1: Configure Arguments
Once you've decided if you want to run your node with Full sync or Fast sync, head over to Settings in Zeet
In the Arguments box, paste
depending on which sync mode you'd like to use. Make sure to click Save!

Step 2.2: Configure Resources
Scroll down to the Resources & Replication section of Zeet. Update the Size to "Custom." It is recommended to have at least:
4 CPU cores
16 GB of Memory

Step 2.3: Configure Storage
Scroll down to the Persistent Volumes section of the Zeet Settings page. Persistent volumes make sure your data is being saved, and doesn't disappear if your node restarts. In addition, Zeet only provides 10GB of disk space by default, and your ETH node will need far more disk space than that.

For the Mount Path, set /root/.ethereum. The size will vary depending on what kind of node you're running. As of this writing (Jan 2021) we recommend:
Full: 650GB+
Fast: 500GB+
Archive: 7000 GB+ (7TB)
Step 3: Access your node
Bam bam oh hot damn, your ETH node is now up and running. Now you might be asking, how do I use this?
Great question.
There are 3 supported protocols for talking to your ETH node:
- JSON HTTP API
OR - WebSocket API
OR - GraphQL API
Step 3.1: Update Arguments
Decide which you'd like to use, and add the following arguments to the Arguments box in your Settings tab:
JSON HTTP API:
WebSocket API:
GraphQL API:
Step 3.2: Update Networking Rules
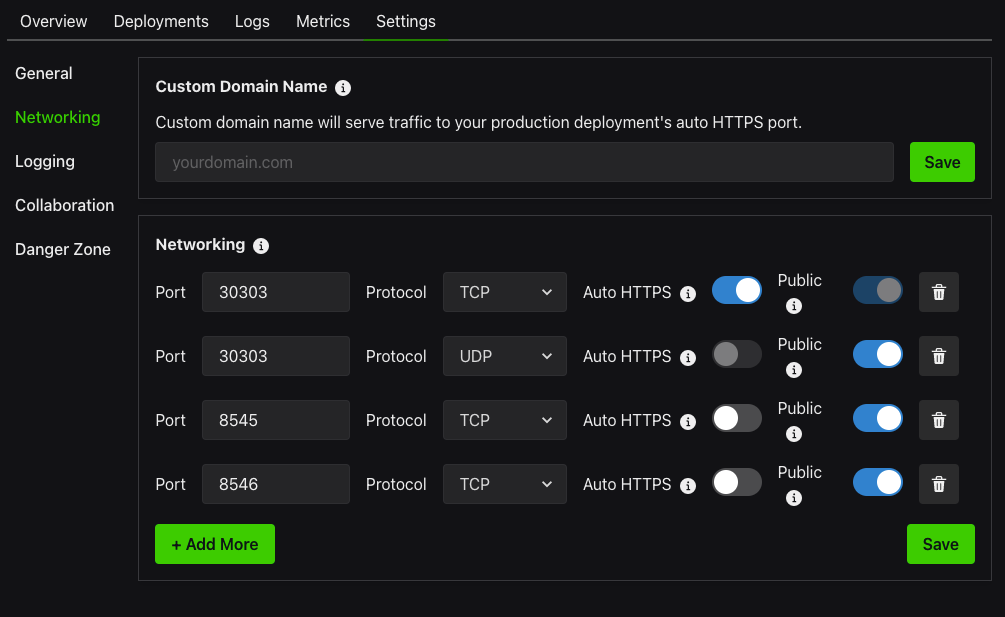
Click the Networking subtab on the right of the Settings tab in Zeet. You should see 4 open ports, like this:

Make sure the two 30303 entries both are configured as follows:
Public: on
Auto HTTPS: off
You only want one 854x port exposed, depending on which protocol you'd like to use. Remove any others.
JSON HTTP: 8545
WebSocket: 8546
GraphQL: 8547
Make sure the port you selected has both Public and Auto HTTPS enabled. For example, this is what the Networking section will look like if you're using the JSON HTTP interface:

Congratulations! 🎉
You're all done! Your very own ETH node is up and running, just like that.
There's loads more you can do with it, which goes beyond the scope of this guide. Check out the Geth documentation for more information.
Have a question, comment, edit, or just want to chat? Join our Discord server, DM me on Twitter or email me!
What's next?
So glad you asked! Now that you have your very own ETH node, maybe you want to try your hand at developing your own smart contract, or build a tool to analyze ETH historical data.
If you develop an application that needs to talk to your ETH node, since we marked all of the ports as Public, you can access your node from anywhere.
However, what if you want faster networking, or want to make sure no one else is using your node?
You can disable Public network access to your ETH node, and connect to it securely through Zeet's Private Networking
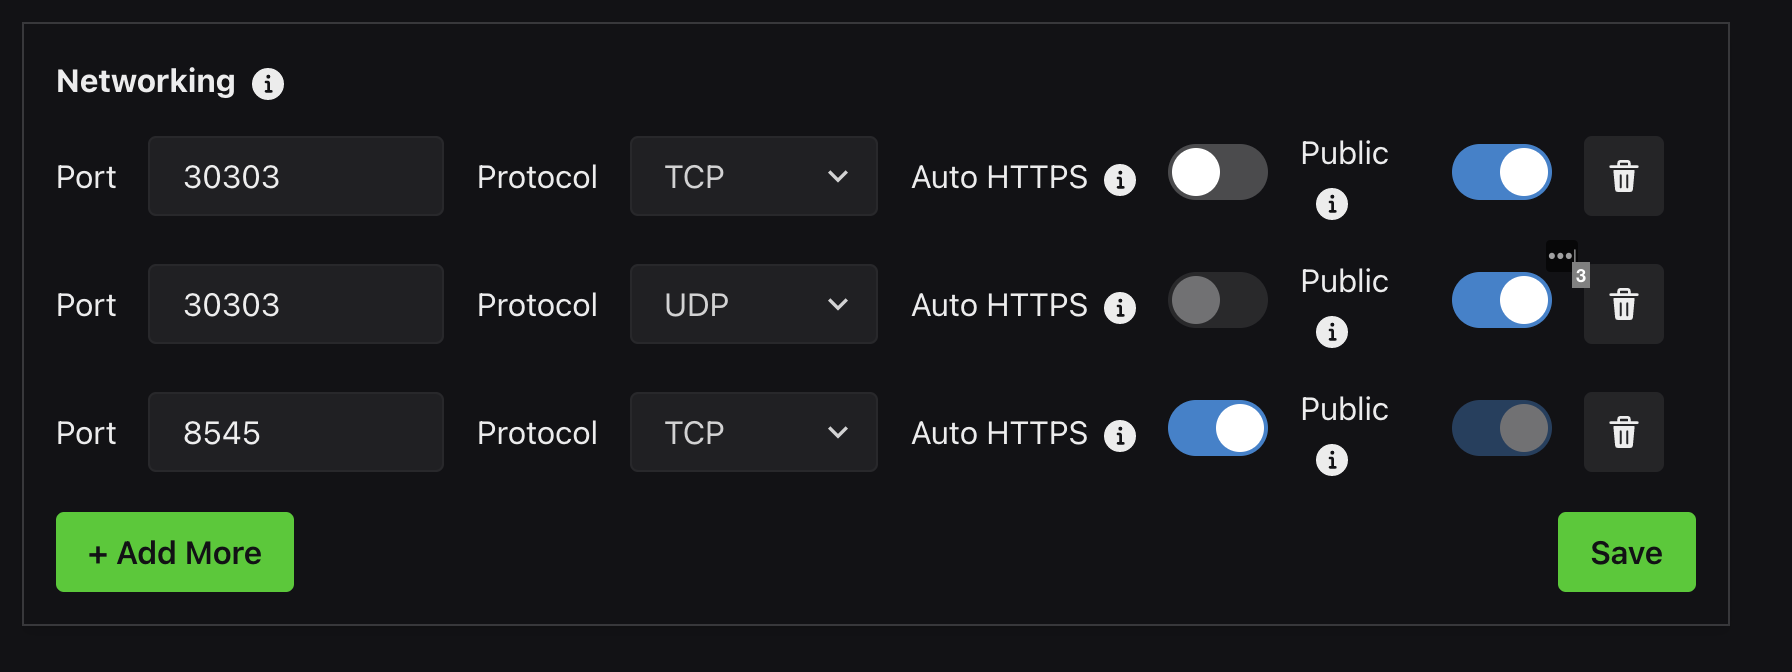
Simply disable the Public toggle on each port, like this:

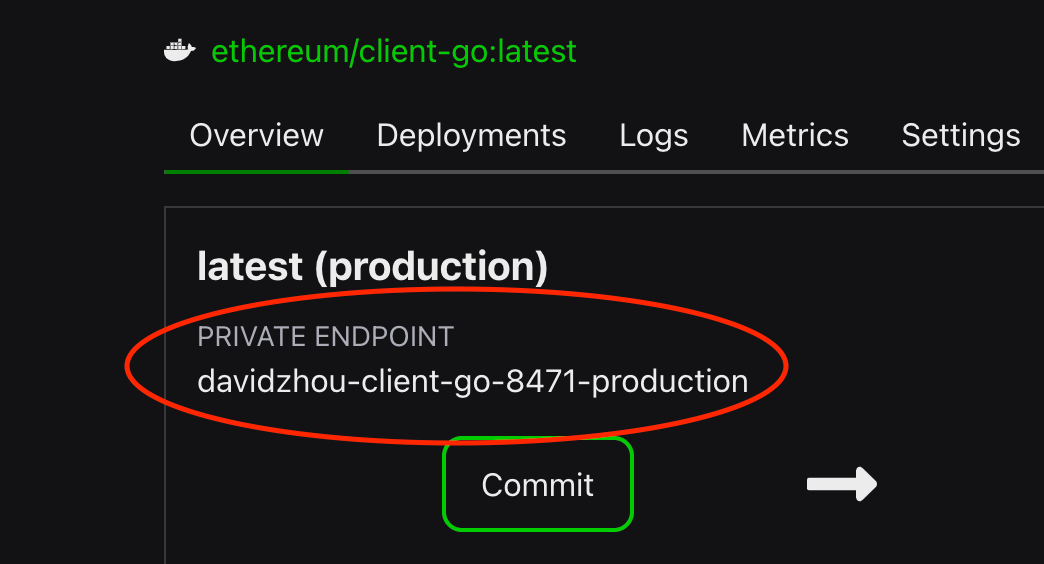
If you check your Overview tab, you'll now see a Private Endpoint. All of your Zeet projects can connect to this project (if the port is added in Settings > Networking, regardless of if it is Public) by using this endpoint.

To use Zeet's Private Networking, you'll need to deploy your ETH application on Zeet as well.
Simply click New Project > Github > Side Project, and select your Github repository.
Once your application is deployed, your service can connect to
(i.e davidzhou-client-go-8471-production:8545 in my example) and you're set!


.png)

.png)


